Wednesday, October 30, 2013

Best Store Bought Frozen Pizza Ever!

The Headlines:


I love pizza. 

Sometimes you gotta eat frozen.

I have found the best, all natural,  frozen pizza ever!


Everyone is picky about pizza.  Pizza is personal.  Some like thick.  Some like thin.  Some of you only eat cheese.  Others just pepperoni.  And the really weird ones like -- hawaiian style.  Kidding.  Kinda.  Let's face it, pizza styles are all over the board.  But if you like thin crust and you occasionally need a pie you can bake to feed a room in 10 minutes - I have got your answer.


The best frozen pizza I have ever had is called Palermo's.  It looks like this in the box.


And once you cook it at 450 degrees for 10 minutes, this is what it looks like.


It is like eating a little piece of heaven.  Really, every time I serve it I get another person on board the Palermo Pizza Express.  Another reason I like it is because it's all natural.  Not organic, which I loook for a lot, but it's minimally processed, no artificial ingredients.


Because you know, frozen pizzas can get really scary if you read the labels.  Seriously, check it out sometime.  Bet you can't say many of those words!  This one says all the stuff you expect:  garlic, yeast, cheese, tomatoes.  I cut really thin slices for my kids.  Bigger if adults are eating it.  It can feed about 3 hungry kids.  It can feed me alone if I'm starving.  But usually I share a little with BP (the husband).  The Margherita pizza is pictured here but they also make an incredible "everything" pizza with super yum sausage and pepperoni on it!  You can find them at probably most major grocery stores - I've seen them there before but I always get mine at Costco.  Four pizza's for around $14.  And when they have them, if freezer space allows,  I buy 2 packages.  Why?


Because they're always out.  Yea, guess I'm not the only one who likes these red, white and green discs of cheesy love!  I wish I could meet the Fallucca Family who apparently started making Palermo's Italian food back in 1964.  I think I may give them a big fat hug.  They make my family pretty happy about once every 2 weeks when they bite into one of their creations.  But anyways,  there I go again, off subject.

Bottom line for you...  this is an amazing pizza.  Even my mom theeee pickiest woman ON the planet - no joke -  loves these.  And, trust me, that's saying a lot.

Monday, October 28, 2013

Own your mess - decorate it!

The Headlines:

We are all busy.

We make messes.

Own your mess.

Give it a name.


So many of my friends are in the throws of motherhood.  Life is crazy and busy and those kids just create messes every step of the way.  Now brace yourself.  This is hard for husbands to realize, I know. But sometimes we can't clean it all up.  Why?  Oh, so may reasons.  Johnny wanted to play.  Jimmy wanted lunch.  Jennifer wanted to breastfeed - 10 times today (the NERVE)!  Therefore, the house is not spic and span by the time the man of the house arrives home.  Yea, and he wanted dinner too!

Yes, mess happens.  It happens to all of us.  But sometimes you don't have to run from your mess -  you can face it head on!  You can even use it as a decorating opportunity.  Please don't want to shoot me at this point.  Just hear me out.  Do you have some space, or, maybe place that tends to accumulate stuff?  It can be in the kitchen.  It can be in the hallway.  Perhaps even the laundry room.  You know, things just settle there.  I'm gonna go out on a limb here and say I'm pretty sure we all have that spot and mine is here.


It's a weird little hallway, if you want to call it that... on the way to our home office.  And for some reason, the builder... perhaps to go with our "adobe style" home... decided to add the little "steps" on the side of the wall.  Weird, huh?  Anyways, no matter how hard we tried not to - we constantly put stuff there.  It's  a nice little space to do that, right?  But wow... did it look bad and MESSY.  So I decided we would embrace the mess and take control of it.

I gave it a name.  Message Center.


I bought a cool burlap covered cork board (Home Goods - $25) and found some size appropriate baskets (IKEA - $8) and a copper tray (Target - $7) - I also got rid of some lame, framed pictures that I put there, for, I'm not sure what reason and it was like the heavens opened and sang "Ahhhhhhhhhh-hhhhh"... I LOVE IT!  The mess has gone no where, in fact, there's more of it... you just can't tell.


Problem solved.  And now the mini hallway looks great... like it under-went a serious facelift in a matter of minutes.  BP (husband ) is happier, life's a little brighter (okay - maybe I'm pushing it a bit at this point) but you get my drift.

Now if only we could do that for the rest of the place...?  Yea, I'll work on that...


**  Hey, if you like this, there's more where that came from!  Go to the home page and put your email in the top, right hand corner where it says "follow by email"... every time I do a new post - it will let you know!  And thanks ahead of time!


Friday, October 25, 2013

Salmon Chowder!

The Headlines:

This is a MUST make!

A chowder your whole family will CHOW!


It's about this time of year I find myself craving chili and chowders.  You know... it cools down to 88 in Arizona and ya just want to bundle up!   I typically buy soups.  But every once in a while, I make one.  Last night, I made a Salmon chowder for my in laws that ROCKED!  No kidding.  I was a little floored myself.  Even my kids loved it!

The best part... actual "work time" took like 10 minutes!


Here's what you need:
6 tablespoons of butter
1 medium onion, chopped
3 or 4 celery stalks, chopped
5 garlic cloves - minced
3 tablespoons flour
1 teaspoon garlic powder
1 teaspoon salt
1/2 teaspoon pepper
1 teaspoon paprika
3 tablespoons of fresh dill
6 cups chicken broth or stock
2 diced potatoes
1-2 cups heavy cream and or whole milk (I actually used a cup of each)
1 pound salmon - pre-cooked or grilled, lightly - broken into pieces
** you can throw in some hot sauce to spice it up too, though I didn't for kids and grandparent purposes

Here's what you do:
Melt butter in a large saucepan, add onion, celery and garlic and cook until it's "see thru"... maybe 5 minutes.  Then add flour, stirring constantly.  About 5 minutes. 


Next, throw in the garlic powder, salt, pepper and paprika and cook for about 1 minute.  Stir in chicken stock, potatoes and cream  (hot sauce also here if you choose)... bring it to a simmer... then cook additional 20 minutes or so until potatoes are soft.  Add salmon, cook for 1 more minute and serve!  

Done.  Feeds 6-8 people.


For the record, BP (the husband) goes fishing in Alaska to get our salmon.  He actually tells me he's going to "work."  Like, y'know, hunting?  It's the "business" of feeding his family.  I'm convinced that caveman thing still exists in the mind sets of men everywhere.  But for your purposes (if your husband doesn't frequent Alaska) get fresh over frozen Alaskan Sockeye or King Salmon.  Sometimes Costco has it.  

Several people I know have made this and they always RAVE about it!  So go warm yourself up with a big bowl of salmon chowder.  And hurry... I hear there's cold in the forecast! 


Wednesday, October 23, 2013

Fans vs. Chandeliers

The Headlines:

No matter how you slice it: fans are ugly!

Chandeliers are good decor.

We live in Arizona.

Which one wins?


Have you ever seen a fan that enhances a homes look?  Don't get me wrong, some are better than others but they're all, rather universally... ugly.  Last week, I had a luxury home builder at my house and for some reason we got on the subject of fans vs. chandeliers.  He said his wife will not allow one single fan into their home.  I was like... sir, your wife and I speak the same language!


Chandeliers on the other hand, make statements.  They often are like pieces of art.  They can help you "Define your Style" and sometimes, even change it, a bit, from room to room! One of the pictures above was taken in my dining room... the other in my "desert cottage casual" living room.  Can you tell which is which?  Sure you can!  They help define that space.

Fans have a harder time of that. What does this fan say to you about this room? 
Yea... not much.


When we built a house here in Arizona back in 2003... I allowed one fan to be put into it.  It went in the office.  The fan was kind of manly and dark brown and, actually, on the better side of horrible.  But, because my husband worked from home at the time - no fan - was not an option.  He has veto power over all my home decisions and for that... he used it.  A fan would go in that room whether I liked it or not!  But there was not one other room with a fan in it.  We had 3 chandeliers plus lamps and  some canned lighting.  I was happy.  I could have used a few more chandeliers but I knew we were going to move eventually so I never pushed it.

When we did move... the house we purchased had a fan in, almost, every room.  Two, in our master.  Every single one of them are ugly.  Some... hideous.  See below.


But remember, for anyone who lives outside of the state that experiences (almost) the hottest temperatures in the entire country.... all BP sees... are the electricity bills.  Our Scottsdale house is about 1500 square feet larger than the Phoenix house we moved from... yet he says the bills are smaller.  He attributes that.... all together now --- to the fans!  According to him, the fans are saving us real cash.  That is awesome.  Saving money, helping the environment... totally ruining my decorating mo-jo!

So what's a girl to do?  How do we make them better?  We need solutions!  Solution number one:  paint. I am not buying new fans.  Not now at least.  So really, the only solution here is to paint the fan.  Paint it the color of the ceiling  (typically white) and they will become somewhat see through.  Like this....


I truly never see this fan.  It just fades away.  So, that is on my agenda.  Painting all pieces of the fans white, to match their ceiling.  Solution number 2...  the higher the ceiling the better.  Our ceilings are incredibly tall.  So, many people probably don't even see the fans - thank you Lord! That may or may not matter to you since, my guess, is your ceiling height isn't going to change.

So good luck in your chandelier vs. fan quest.  Mine is already over and I am full speed ahead on the fan train.  Just going to try to make it a less rocky ride!  

By the way, there is one time a fan does work.


When it's outside.


**  Hey, if you like this, there's more where that came from!  Go to the home page and put your email in the top, right hand corner where it says "follow by email"... every time I do a new post - it will let you know!  And thanks ahead of time!


Monday, October 21, 2013

Crap! It's my 10 year Anniversary!

The Headlines:

We've been married 10 years! Holy Moly!

What do I get a man who gave me my world? 

I give him the world.


So, it was our 10 year Anniversary on Friday.  October 18, 2003 BP and I got married.  Thank God!  Best decision I ever made.  I won't go through our long history... you're too busy to listen to my life story but -- I will say we met in college.  And because I'm picky I can't just get the guy a tie or a massage for such a momentous occasion.  It had to be more.  I wanted it to be special and cool.  Meaningful.  Since, I'm picky and all!  But WHAAAAAT?

I went on line and found out 10 years was tin or aluminum.  And I was like... huh?  I get the guy a can of beer?  Or better yet - buy him some aluminum cookware (which has been linked to alzheimer's disease - seriously!) - nope not gonna work!  And I hate (most of the) really cheesy gifts you can get at Red Envelope (some aren't too bad).  I was lost.

So, to spur my creative juices I began to write this post!  Would you believe it worked?  I love this blog!  As I wrote the headlines (above) I came up with an idea.  What do I get a man who gave me my world?  I give HIM the world.  It was a start.  But how would I...?  A couple minutes later I came up with my partial plan.  I found a large (36" x24") vintage poster of the world and a white frame that would fit it.  Then my idea was to put a large photo of us in the middle.  But I was afraid it would look kinda lame. It did.  SO I took out the picture (bought a separate frame for that)  and then a friend suggested I mark all the places we had gone together.  I did.  With hearts.  And it doesn't look cheesy...


Then I free-handed wrote "You Gave Me the World..."


We went to Europe and, of course, Hawaii... so there are other hearts out among the rest of the world too.

And that's it!  The only other thing I did was add an extra coat of spray paint on the frame and then scuffed it with an electric sander to make it a bit cooler.  Minor detail.


And then I placed it... also with that large picture frame of us - in our room.


Simple.  Inexpensive.  Map $10 plus tax & shipping, frame $40 plus tax & shipping, paint pen  $3...  And most of all, a gift, I think (hope), will matter more than any tie I could have bought him.

I wrote this blog post for one main reason:  to encourage you to think "outside the box" - is that the most annoying term ever?  Yea, I just used it too... but really to go beyond what you're used to doing for the person who may mean the world to you - and do something different.  Your precious idea will come to you.  Maybe on a walk, when you're writing, or perhaps in the middle of that boot camp class.  It will come to you - if you look for it.  And the person who receives it will feel honored that you took the time to go beyond the dozen roses, the fancy dinner, or even that gorgeous watch!  Because what you gave him or her, in thought, may just matter more.

And what, do you ask, did he get me?  Well, I can't write everything on this blog!  Some things have to stay a secret!  But it certainly wasn't a map!


**  Hey, if you like this, there's more where that came from!  Go to the home page and put your email in the top, right hand corner where it says "follow by email"... every time I do a new post - it will let you know!  And thanks ahead of time!

Friday, October 18, 2013

Define your Style!


WHAT is Defined Style? 
Think of it as giving your home an identity.  It's not easy to do, at first.  But once you get it down... I promise - it will make your (decor) life so much easier!

Now, you have given yourself a very clear path on which to drive on.  No longer are you taking a road trip, unaware of where you're going.  Once you define your style - think of it as if you are on the 10 freeway and you're not getting off at a rest stop or a McDonald's because you know exactly where you're going and will not be detoured.  Therefore, when you go into decor stores, you can look and admire things but know what you will and won't buy because it either fits or doesn't fit your "defined style."

HOW do you Define - Your - Style? 
Use 2 to 3 words that describes how you like (or how you want to) decorate.
I'm helping someone with her home right now which we're calling: Rustic Modern Glam

I define my style as "Desert Cottage Elegance"... what in the world does that mean?   It means I live in the desert but I like to decorate differently than most people here.  I don't do Tuscan, or Southwestern or Contemporary, which are common themes.  I appreciate Antique/Farm House looks and I grew up on the beach so I like the light, airy, not too formal, "loved in" look!  But desert to me also means bringing in some browns... for some reason dark brown reminds me more of desert than light brown.  Light brown implies beach town.  My main home colors are very basic: white, dark brown, black.  I like to bring in color on a seasonal basis.  Summer = turquoise, Fall = orange, Christmas = red, New Year sticks to neutral colors, Spring = pink/pastels.

Here are some small examples of what I call "Desert Cottage Elegance"  A white kitchen with some warms browns (floors and granite) and textures (wicker counter stools) mixed in so as to not make it too cold.

A wreath hung in front of a mirror... that I "antiqued."


I love windows as "art" ... I particularly like putting fabric behind the glass.


There are always places or "nooks" that you need to do something with... you can make them functional or more visual.  This is much more the latter... but it fills the space nicely and gives it purpose


This is an old stool with some new fabric on it.  I love old stools like this in corners that have no room for anything else... again giving the space a small purpose while enhancing the "Desert Cottage" style of my home.


Everyone knows painted furniture screams cottage.  I love to paint furniture... not all of it but some.  White is usually my preference.  This is our kitchen table and I love the "art" on the wall behind it.  They're just old grates but so pretty! Avert your eyes from the since "re-done" bar in the background.  You can see it HERE ... it's a Do-it Yourself Wine Box Bar Front and it's pretty special!


Now, keep in mind... these are just little "vignettes," if you will, of my "Defined Style".
Here's another fun one: DIY Window Screen = A Picture Frame! See that project HERE ... finally one of my popular posts ever is this Picket Fence Headboard - see it HERE.


WHEN should do you Define - Your - Style? 
There's no time like the present.  If you need help... reach out!

Now go get your Defined Style ON!  Whatever it is...

Wednesday, October 16, 2013

Make a Pallet Coffee Table

The Headlines:

We need a new coffee table.

I wanted to make one out of a pallet.

We did.

But... I'm picky... so...?? 


I love the look of pallets.  I  know it's weird... but when I see them "driving" down the street they always catch my eye.  Even in that super raw state.  I think the pallet look is cool.  There are so many things to do with them, I feel they're just calling my name.  So... when I asked BP (the husband) if he'd be interested in making a coffee table out of a pallet.  He was super stoked.  Okay, maybe that's over-playing it a bit.  But he was game.  He was willing.  He was up for the task.  Mainly because, it's such an easy task.  Right?  Honestly.  Our plan was simple.


Get 2 pallets.  Buy 4, 4x4's.  Home Depot or Lowe's will cut them to you height specs.  Glue wood with wood glue... drill holes, fill with wood glue and sink 6 inch bolts to attach them to the pallets.    


Attach second pallet the same way.  Then prime and paint.  It took like 8 hours with glue and paint drying time.  EASY!  For BP,  have I mentioned he's awesome?  And this is the finished product.  I LOVE it!


Really I do.  It's exactly what I wanted.  It looks great.  Pause pause pause... wait for it...  except I wasn't quite sure it worked.  For 2 reasons... it's a little too white.  No biggie, we can re-paint  a more cream color.  But even more importantly, for the room, I think it's a smidge bulky.  And I keep going back to this picture. 


I really may like the way it looks without a second pallet below it.  I think it could go with the room a little better.  Not to say I don't LOVE the other one, because I do!  And here's the best part... this picky chick's husband agrees.  Thank God!  So, we're doing another one and deciding which we like better!  Yes, I was fully prepared for my husband to want to kill me... I'm so glad he didn't!   

So, are you ready for this task?  Of course you are... just remember they are large, bulky coffee tables so you need to pick the right space for it.  When you do, you're going to love love love it too!  Stay tuned... I'll show pics of the next one and maybe you can help me decide!  
  

**  Hey, if you like this, there's more where that came from!  Go to the home page and put your email in the top, right hand corner where it says "follow by email"... every time I do a new post - it will let you know!  And thanks ahead of time!


Monday, October 14, 2013

Fall Break Treat!

The Headlines:

It's fall break in Scottsdale!

Time for a not-too-hot not-too-cold kid treat.

Recipe for easy Snickerdoodle-Coconut Ice cream sandwich!


Fall break in Arizona never feels really "fall-ish"here... honestly.  It's still in the 80's... and quite frankly that's cool!  Typically, we're, I swear, usually in the 90's and sometimes closer to 100 degrees through October!  Which means, for a fun kid treat... we can still do some sort of ice cream!  And boy... do I have a great ice cream sandwich that adds a little taste of fall (the cinnamon.  Yes that's how I think, I only do season appropriate food - I fully understand I'm different) into the home.  And yes, as always, so stinking easy!

Snickerdoodle/Coconut  Ice Cream Sandwich


Here's the problem with this treat.  Adults eat them all before the kids can go back a few days later and have seconds!  Sorry.  But for a mom at night... this dessert just calls my name once the kids go to sleep. Because, yes, it is MAJOR yum.

Okay you'll need:
Vanilla Ice Cream (Breyer's natural vanilla is one of my favs)
Snickerdoodle cookies  (either buy or make however you want - I choose Pillsbury tube sugar cookie refrigerated dough, you know the kind)
Cinnamon and Sugar (if you make your cookies)
Sweetened Coconut
Corn Flakes (whatever brand, this last time I used some Gluten free type because my father-n-law had left them here... what can I say, his loss, our gain!)

Toast the coconut first.  Put about 1 cup plus on a cookie tray and lightly toast it under the broiler.  Don't burn it which is easy to do.  Then make the cookies.  I use that sugar cookie dough tube by pillsbury and just sprinkle some sugar and cinnamon together in a bowl, mix, and then heavily sprinkle that on the cookies before they bake.  While that's happening take some corn flakes , maybe 3 cups, place in a baggie and smash them.  Not too small.


Then place on a plate.  Once cookie's are done they need to cool.


When the cookies are cooling take out the ice cream so it's not hard as a rock and, when it's ready, fold the coconut into the ice cream... throw a little cinnamon in there too, not too much, just for fun!  Then grab a cookie and with an ice cream scooper, plop some ice cream on a cookie, smash (not too hard or they will break) another cookie on top and roll the ice cream sides that are popping out a bit over the corn flakes.  Work fast!  If the ice cream get too melty, watch out!  Then cover each one with some plastic wrap and freeze right away.  Kids can help with this, have them open the freezer each time and hand you plastic wrap because I'm telling you - time is of the essence.  Then freeze them for a few hours before actually serving.  They'll keep in the freezer for weeks!

I have been making these for years... and they NEVER disappoint.  Any of us!  Sorry, mom who's on a strict diet!


Wednesday, October 9, 2013

The No-time Party Dip!

The Headlines:

I can't cook.  I have no time.

But I love entertaining.  And I love yummy food.

Here's how to make a major yum dip for a major fun party!

Yea, it's pretty clear to most of you...  I can not cook.  In fact, I really don't enjoy it much.  I do it out of sheer necessity.  No eat, no life, no parties!  Wait, I do like "cooking" when I'm drinking a glass of wine and am watching my husband do most of the heavy lifting while I pour a cup of flour or something like that.  Yea, but honestly, those days are gone now that we've arrived in kid-ville.  Back to the point, I DO NOT ENJOY COOKING... like so many other women out there who say it's calming and even healing.  Good for you guys, by the way.  But that's why I love this dip.  It takes no time but packs a serious punch!  And it's versatile... perfect for a summer BBQ or, more appropriately to this time of year... a fall party!  In fact, I'm heading to a progressive dinner in a few weeks...I'm signed up for appetizers... this is what I'll be bringing.

Caramelized Onion Dip


Here's how you do it... you're gonna die it's so easy!  Grab your favorite toasted onion powder dip (due to the caramelized onions it works better than the green onion powders for this dish) and some sour cream and mix like you usually do.  Here's where the WOW comes in... thinly slice some onions  (don't dice) and first choice would be a yellow onion but anything works.  I used a red onion the time I took these pictures because that's all I had in my fridge!   Size: I would say a medium onion per about 16 ounces of sour cream (but it's really up to you how many onions you want in it)... pour some olive oil in a pan, add thinly sliced onions and sauté until they look caramelized.  About 5-10 minutes, depending upon how many onions there are or how much time you have... these below could have used a few more minutes but it was still major yum!


Then all you do is wait until they cool and add them to your sour cream dip already mixed together.  Voila! You can not go wrong.  And it soooo elevates a boring, old onion dip everyone makes at every-single-party-you-ever-go-to!  Enjoy -- now go have some fun and don't spend too much time in that kitchen!


**  Hey, if you like this, there's more where that came from!  Go to the home page and put your email in the top, right hand corner where it says "follow by email"... every time I do a new post - it will let you know!  And thanks ahead of time!

Wednesday, October 2, 2013

EGG Lasagna!

The headlines: 

Lasagna makes me feel like a lump.

This doesn't.

Plus it's crazy good.


Honestly, I actually don't love lasagna.  But BP (that's the husband) dies for it!  I dunno, am I alone when I say I eat it and it just makes me feel like a lump of clay!?  I actually kind of can't stand food that makes me feel like a lump of clay.  Pancakes do that.  Nothing like feeling a big block of concrete in your belly.  Back to the point.

This doesn't do that.  And the husband, like's it better than traditional lasagna.


It's a bunch of tangy tasty good but light and lovely on your tum at the same time.


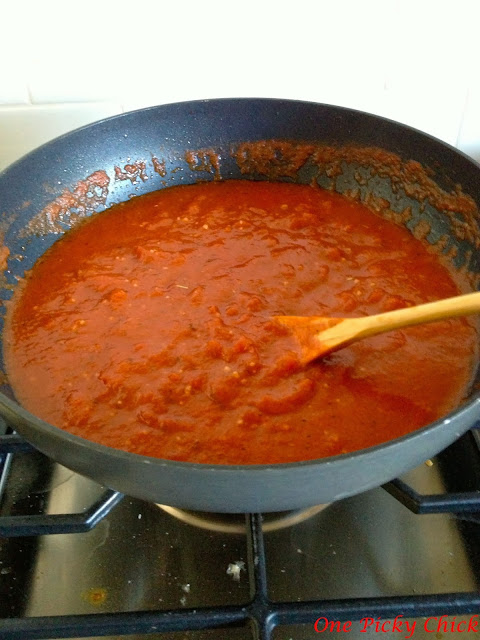
The beauty of this recipe is that it also shows you how easy it really is to make your own pasta sauce (or gravy if you're from Jersey! wink.)  Actually, if you're from Jersey you don't need the sauce part.  Pretty sure you got that.    

Here's what you need:
olive oil
4 (or more, I always do a ton) minced garlic cloves
italian seasoning
2 cans (15 oz each) diced tomatoes
1 large can crushed tomatoes
1/2 grated cup parmesan cheese (again, i always use more of this too)
salt and pepper
8-9 large eggs
large/medium casserole dish or 4 ramekins

In my house we do lots of organic, I know it's pricier and I pick and choose but I definitely do eggs organic.  Also, Costco also has a great line of canned organic tomatoes.  $5.99 for 8 cans.  That's cheaper than non-organic at any grocery store!  You gotta get them!    


Here's what you do:
Pre-heat oven to 350 degrees.  Place olive oil in large saucepan.  I use a super sized one.  Add garlic, cook, stirring until it turns slightly golden.  Add tomatoes and half the parmesan.  Also, a little Italian seasoning throw in some salt and pepper... bring to a boil.  Reduce to a simmer, cook and stir.  Until thickened.   Taste and decide if it needs any more seasoning.  First of all -- AWESOME - you have your own pasta sauce to use for anything!  How easy was that.


Now you're pretty much done.  Bake it 1 of 2 ways.  Individual, large ramekins or one big cooking dish, like what a typical lasagna would go in.  Either one you take a little more than half your sauce and place it in the dish (es)... crack your eggs, either 2 per ramekin or all of them in your baking dish.


Add more pasta sauce on top of the eggs and sprinkle with remaining parmesan cheese and/or add more!!


Then place ramekins on a cookie sheet and bake 25-28 minutes, turning halfway through or place entire casserole dish in oven and bake for closer to 40 minutes. Check to make sure it's done by shaking it a little - if it doesn't jiggle like raw eggs - it's probably done!  


Add some crusty bread (or BP loves his tabasco) and you're good to go!  Tastes just like normal lasagna but without the heaviness of pasta... enjoy.

© One Picky Chick. Made with love by The Dutch Lady Designs.